Painting cabinet doors and drawer fronts is easy, but it’s important to do it correctly. This will ensure that the paint job is long-lasting, and will withstand heat, splatter and daily use.
The first step is cleaning the surface and crevices of the cabinets. A degreasing cleaner is recommended to ensure pristine paint adhesion.
Preparation
Cabinet refinishing is an excellent way to freshen up your kitchen or bathroom without the cost and hassle of replacing them. However, it’s vital that you take the time to perform quality preparation before beginning the refinishing process. Taking shortcuts here can lead to disappointing results. If you’re not careful, your cabinets will look worse than they did before and the problems you covered up with new paint will reappear later.
The first step is to remove your doors, drawer fronts and hardware. You should also label each piece with a marker or piece of tape, so you’ll know which one goes back where (e.g. “above sink, left”). If you’re worried about forgetting where something goes, keep a jar handy and put the screws and hinges in there. This will help you remember when it’s time to reattach them.
Next, thoroughly clean all surfaces. You can use a degreaser spray (such as Krud Kutter) or soap and water. Make sure to get into all the corners, crevices and tight spaces to ensure they’re completely clean. You should also wipe down the cabinet frames with TSP (trisodium phosphate) to eliminate grease and dirt. This will allow the new finish to adhere properly.
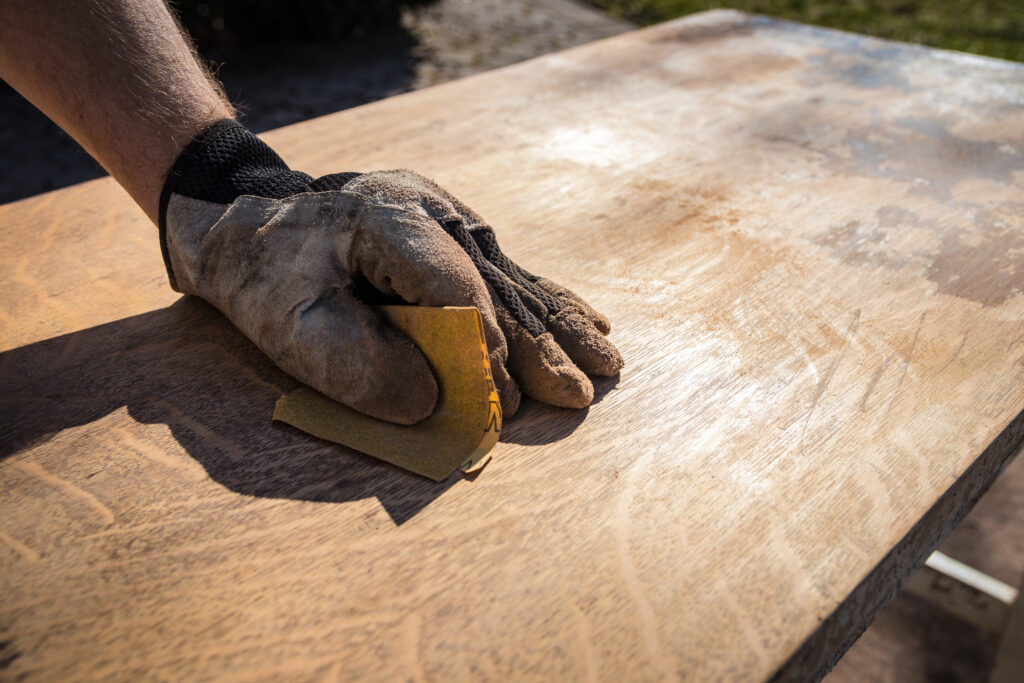
Once all surfaces are clean, sand them. This is a crucial step and should be done with a medium-grit sanding sponge or 180-grit sandpaper on a random orbital sander. You don’t need to go all the way down to bare wood, but you do want the cabinets to be thoroughly scuffed to give the new paint something to adhere to. Then vacuum and tack rag off the remaining dust.
When you’re ready to start painting, choose a high-quality urethane alkyd enamel paint. It will be much more durable than a standard latex paint and will hold up to everyday wear and tear. It’s important to follow the manufacturers instructions and work in a well-ventilated area.
When you’re ready to apply the first coat, let it dry for a few hours. Once it’s dry, you can move on to the second coat. Between coats, be sure to sand the surface to smooth out any bumps or rough areas.
Primer
A coat of high-quality primer is a necessary step when you’re performing cabinet refinishing. Primer is responsible for preparing the surface and ensuring that the topcoat paint sticks. It also solves a variety of issues including porous surfaces, stains, unwanted odors, uneven sheen, and texture.
It’s a good idea to use an oil-based primer, as it offers the best stain blocking properties. However, you may be able to find a water-based primer that will work as well. If you choose an oil-based primer, make sure to follow the directions for proper usage and cleaning.
Depending on the type of paint you’re using, there are many different types of primers available to help ensure that your cabinets will look great and last long. A great choice is KILZ Kitchen & Bath Primer. This primer creates a mildew-resistant coating and offers excellent adhesion to most interior surfaces. It can even be tinted to allow you to better match the color of your desired topcoat.
If you’re using a latex primer, you should choose a formula that is designed for your particular surface. This can be determined by the type of surface and whether or not you want a glossy finish. A primer that works well on most surfaces includes INSL-X STIX Waterborne Bonding Primer. This primer bonds to hard-to-coat surfaces, is moisture resistant, and can be recoated in 30 minutes.
Before you start priming, be sure to protect the surrounding area with painter’s tape and drop cloths or sheets. This will help to prevent any mishaps that could ruin the whole project. You should also remove any handles or hardware that may get in the way of your painting process.
Once you’ve prepared the surface for priming, sand away any existing stain or paint. This is a crucial step that you should never skip! You’ll need to sand the surface until it is smooth, but not so much that it becomes slick. It’s important to use a sander that isn’t too rough, as this can cause the new primer or paint to chip and peel over time.
Sanding
Cabinet refinishing is the process of working with your existing cabinets and removing or stripping the old finish in order to prepare them for stain or paint. This typically requires a lot of work and can take several days. To get the best results, it’s important to plan well and make sure you have enough help on hand to do the work thoroughly.
The first step in a successful cabinet refinishing job is to properly clean the surfaces. A thorough cleaning with a degreaser will remove any dirt, grease, and oil that may be on the surface or in crevices. This will ensure that the new primer and paint adhere to the surface properly.
Once all of the surfaces are cleaned, it’s time to sand. This is usually done with an orbital sander, but it can also be done by hand. Start with a medium grit, and then move on to a finer grit to remove any scratches or rough areas. A sanding sponge can be used to reach difficult spots and corners. After sanding, be sure to vacuum and use a tack cloth to remove any lingering sanding dust.
If you’re going from a light color to a dark shade, this is when you’ll want to do a second sanding with a 220-grit sandpaper. This will give the surfaces a smooth finish, and be sure to wipe everything down with tack cloth to remove any remaining sanding dust before moving on to the next step.
For painted cabinets, you’ll need to add a coat of primer. This will provide a base for the rest of the paint, and it will help seal knots and other defects that might show through the topcoat. Be sure to use a high-quality, oil-based primer. If you’re refinishing oak or walnut cabinets, a stain-blocking primer will be necessary, as these species have a coarser grain texture that can show through the topcoat.
After the primer has dried, you can begin painting the doors and drawer fronts. Be sure to wait a day or two before adding the final coats of paint, and be sure to allow the paint to dry completely. It can be tempting to rush the process, but rushing can lead to smudges and drips that will require extra re-painting or even replacement of the doors.
Painting
Cabinet painting is an effective way to give your cabinets a facelift without undergoing a full remodeling project. It allows homeowners to change the look of their rooms with new colors that are popular in their homes without breaking the bank for a complete renovation. When performed properly by a professional, it can also last longer than other methods of cabinet repair like refacing and replacing.
The type of paint that is used will have a big impact on how well your painted cabinets stand up over time. A high quality paint that is meant for use on cabinets will have a durable finish that can withstand chipping, peeling, and scratching. This paint will also have a primer built in that helps the base coat stick to the cabinets and prevent staining or discoloration from the underlying material.
Before the actual painting begins, the cabinets need to be cleaned to get rid of any dust and dirt that may have accumulated over time. Using a mild detergent is usually enough to remove the grime from most surfaces. After the cabinets are cleaned, they should be sanded again to prepare them for the new layer of paint. When the sanding is complete, a good quality oil-based primer can be applied to help the base coat adhere to the cabinets.
Once the primer is dry, it can be sanded again to smooth out any rough areas. Then the final coats of paint can be applied. It is important to choose a color that matches the rest of the room and will compliment your cabinets. When deciding on a color, it is also wise to consider how often you plan to wash the cabinets and what kind of stains or spills are likely to occur in the future.
When painting cabinets, it is necessary to allow the paint to fully cure before putting them back into use. This can take a few days. During this time it is best to be careful and not slam doors or scrape the surface of the cabinets. It is also a good idea to wipe them down occasionally so that messes can be cleaned up quickly.