Cockapoo Puppies

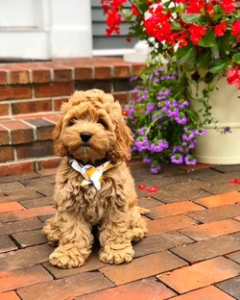
Cockapoos are social creatures and love spending time with their families. They can live in apartments but are happier with a small fenced-in yard where they can play.

They need regular grooming to keep their long floppy ears free of dirt and moisture that could lead to infections. The veterinarian can advise you on the best way to clean their ears. Contact Cockapoo Puppies For Sale Ohio now!

Cockapoos are generally very healthy dogs with an average lifespan of 12 to 15 years. They thrive in family homes with regular exercise, mental stimulation and nutritious food. Keeping up with routine vaccinations and dental care is also important to help prevent health issues in your dog.

This intelligent breed makes great companions and is very loyal to their owners. They are very social dogs that get along well with other animals and humans, including children. However, young children should always be supervised around any dog to prevent injury. Because of their social nature, cockapoos may become anxious or nervous if left alone for too long and could develop separation anxiety. This is normal, and can be addressed with positive reinforcement such as playtime and tiny treats.

Due to their size and floppy ears, cockapoos are more prone to ear infections. This is why it’s important to regularly clean your pup’s ears and keep them dry, especially after bathing or going for a walk in rainy weather. It’s also a good idea to brush your dog’s teeth on a regular basis and trim their nails every few weeks. This helps keep their fur healthy and reduces the likelihood of painful tangles and irritations.

Like other small-breed dogs, cockapoos are prone to dislocating their kneecaps, a condition known as patellar luxation. The kneecap sits in a groove at the end of the femur bone, and if it slips out of place, it can cause pain, inflammation and lead to arthritis later in life. Treatment options for this condition include surgery, weight management and physiotherapy.

Cockapoos also have a higher risk of developing cataracts than other breeds, which can affect a dog’s vision by making it blurry or cloudy. This is a progressive disease that can result in blindness over time, so it’s important to know the signs of this eye condition and seek veterinary attention as soon as you notice them.

As with any pet, cockapoos are susceptible to gastrointestinal issues such as gastroenteritis, which causes vomiting and diarrhoea. They can also be prone to obstructions in their bowel, which is often caused by eating items such as stones, cloth or string. These conditions can be serious and require veterinary intervention, but early detection and treatment will usually make the difference.

Training

Cockapoos are intelligent dogs that thrive on training. They can be easily trained to follow commands and will quickly become accustomed to a regular training routine. They also enjoy the social aspect of training and tend to bond well with their owners. As a result, these dogs are often good for first-time dog owners.

Since cockapoos are so active, they need a good amount of physical exercise. Walking, playing a game of fetch, or even short runs can provide the needed stimulation. They can also release pent-up energy through supervised puppy playdates with other dogs.

While positive reinforcement is a cornerstone of all training, it’s important to address undesirable behavior with gentle corrections and redirection techniques. This helps keep your pup’s attention on what you want them to do rather than the things you don’t. For instance, if your cockapoo chews on inappropriate items like shoes or the couch, redirect them to a designated chew toy.

Potty training is another crucial component of raising a cockapoo. These intelligent dogs can learn quickly, but they will need to be given frequent opportunities to go outside. Be patient during this process and remember that everyone learns at a different pace.

It’s also a good idea to keep a journal of your dog’s bathroom habits so you can start to notice patterns and anticipate when they might need to go outside. This will help speed up the potty training process and prevent any accidents from occurring.

In addition to training your cockapoo, you can also consider introducing them to competitive sports such as agility or obedience trials. These activities involve owner and dog working as a team to complete obstacles and courses. Some clubs offer classes, equipment rentals, and other resources that can help you train your cockapoo for these events.

Some of these activities are best done under the supervision of an experienced handler to ensure your dog’s safety and success. However, if you’re confident in your abilities and would like to train your dog in these activities, the AKC offers obedience and agility trials for dogs of all breeds.

Exercise

Cockapoos are active dogs and need plenty of mental and physical stimulation to keep them happy. Regular walks, playtime with you and other dogs, and daily training sessions help them burn off their energy. However, if your cockapoo exhibits signs of hyperactivity (which can include excessive panting and drooling) then it’s important to address the issue as soon as possible with veterinary care. Hyperactivity may be caused by underlying medical issues like thyroid problems or anxiety, and swift intervention can significantly alleviate the condition.

Because both poodles and cocker spaniels have a history as retrievers, it’s no surprise that your cockapoo will love playing fetch. Fetch is a great way to get your dog’s heart rate up and it helps build their muscle strength and endurance. Additionally, it’s a fun bonding experience for both of you!

Agility training is another great way to get your cockapoo’s heart rate up and it’s also a fantastic form of mental exercise. As your pup progresses through agility training you can gradually increase the difficulty of the exercises, which will challenge their brain as well as their body.

Younger Cockapoos will need less exercise than adult dogs, but they should still have two good walks a day and time to play around the house and garden. Younger dogs will do best with a ‘little and often’ approach to exercising, as this can prevent overexertion and protect their growing joints.

Cockapoos can suffer from a variety of health conditions, including hip dysplasia, patellar luxation, and ear infections. These conditions can have a serious impact on the quality of your dog’s life and may even require surgery to correct.

In addition to the above health concerns, cockapoos are prone to allergies and can develop dermatitis. This is a painful condition that can be caused by things that are inhaled, eaten, or touched by the dog, as well as fleas and other parasites. The good news is that many types of dermatitis can be managed with medication, which will reduce your dog’s symptoms and improve their quality of life.

Care

Cockapoos are intelligent, eager-to-please dogs that are often quick to learn. They are also nonaggressive and friendly with everyone, including children and other pets. Because they are small, however, it’s important to teach kids how to handle and play with them in a safe manner. Especially during the teething phase of puppyhood, Cockapoos may be more likely to nip or chew on fingers, so it’s important to supervise them at all times.

They also require plenty of physical and mental stimulation, so they can’t be left alone for long periods of time. While Cockapoos are fairly adaptable to different environments, they’ll do best in a home where there isn’t an excessive amount of loud noise. They are very sensitive and are prone to anxiety, so they may react to loud sounds like the mailman or a noisy neighbor. In these cases, a calming probiotic supplement or calming treat can be helpful for them.

Regular grooming is also important for keeping their coat healthy and preventing it from getting matted. It’s important to brush them regularly and trim their hair, especially during the shedding season. A regular grooming routine helps your cockapoo maintain a beautiful, glossy coat and builds a strong bond with them.

In addition to taking care of their physical health, cockapoos need proper nutrition and hydration. They should be fed a high-quality dog food that’s appropriate for their age, and they should always have access to fresh water.

Keeping their ears clean is another essential part of their care. Because of their floppy ears, they are prone to ear infections. A veterinarian can help advise pet parents on the best ways to clean their cockapoo’s ears to prevent infection.

Because of their high-energy, Cockapoos need to be on a good feeding schedule. They should be fed twice a day and their food should be low in fat to avoid obesity. Likewise, it’s important for their overall health to keep up with their vaccinations and wellness exams. These visits can prevent serious diseases and conditions, such as cataracts, hip dysplasia, and patellar luxation.

Cabinet Refinishing – Give Your Cabinets a New Look

Cabinet Refinishing San Jose CA involves staining or painting your existing cabinets. Nothing is removed from your cabinet bases or frames and this process can be up to 70% cheaper than refacing.

Cabinet Refinishing

If your cabinets are in good shape but are showing signs of wear and tear, refinishing them will provide an instant refinement. However, this process can be challenging and should only be done by a professional.

Refinishing is a complex process, one that requires skill and experience to achieve good results. If you’re not sure that you can handle it on your own, consider hiring a professional.

The first step is to prepare the cabinet surfaces for painting by sanding them with medium-grit sandpaper to remove any existing finishes and create a smooth base for the new coat of paint. This will also help to get rid of any scratches or dents in the surface. Fill any holes or gaps in the wood with wood filler and sand again until it’s super smooth and ready for a fresh coat of paint.

After sanding, the cabinets should be thoroughly cleaned to ensure that all traces of grease and grime are removed before applying the new finish. This will also help to make sure that the new coat of paint adheres properly. A mild cleaner such as TSP (trisodium phosphate) or Simple Green will usually work, but you may need to use a more potent chlorine mixture if there are heavy grease deposits on the surface of your cabinets.

Once the cabinet surfaces have been cleaned, they should be primed to seal in the sanded areas and provide a clean surface for painting. The primer should be allowed to dry completely before continuing with the next steps.

During the refinishing process, it’s important to remember that you should always be working in a well-ventilated area and using the appropriate respiratory protection. This is because sanding can generate a lot of dust and fumes that can be harmful to your health if inhaled.

If your cabinet doors are made of thermofoil or laminate, then they won’t be able to accept new paint or stain and will likely need to be replaced. If your cabinet doors are made of real wood, then they can be refinished and will look great for many years to come. Just be aware that the natural oils in your hands will eventually break down acrylic paints, so they’ll begin to chip and fade over time if not properly cared for.

The Materials

If you’re planning on refinishing your cabinets to give them a new look, you’ll need some basic materials. These include a screwdriver, sandpaper (medium and fine grit), wood filler, putty knife, and painter’s tape. You’ll also want to have some drop cloths, which will protect the surrounding surfaces from paint splatter.

Before you begin the refinishing process, you should remove all of the hardware from your cabinets and label it so that you can reinstall it when the project is finished. You’ll also need to clean the cabinet surfaces thoroughly with a mild cleaner to ensure that any dirt and grease is removed before you apply a new coat of paint.

If your cabinets have a glossy finish, you’ll need to use a deglosser to roughen the surface so that the primer or paint will adhere properly. You should also mask off any areas you don’t want to paint, such as the inside of the drawers.

The next step in the refinishing process is to sand the surfaces of the cabinet boxes and doors. This will create a smooth base for the new stain or paint, and it’s important to sand to the proper level so that you don’t end up with a bumpy or uneven finish. After sanding, you should wipe down the surfaces and allow them to dry completely before moving on to the next step.

Once your surfaces are dry, you’ll need to apply a coat of primer. You can purchase a cabinet primer at most home improvement stores, and it’s important to follow the manufacturer’s instructions for applying the product. Once the primer is dry, you’ll need to sand again to make sure that all of the imperfections are even and smooth.

Once your surfaces are ready to be painted, you’ll need a high-quality cabinet paint sprayer. This will make the job much easier and faster, and it will help you achieve a professional-looking result. Choose a cabinet paint that is specifically designed for refinishing cabinets, and be sure to use a sprayer with a wide nozzle. This will help you get the most coverage possible and avoid any drips or runs.

The Cost

Cabinets are one of the most used items in a kitchen and over time they can become damaged from wear and tear, scratches, or even cracks. This damage can affect the overall look of a kitchen. Cabinet refinishing is an option for homeowners to help change the look of their cabinets without replacing them. Refinishing involves stripping the existing cabinets and sanding to give them a new coat of stain or paint. This can be an easy DIY project if you have the necessary equipment and time. Refinishing can also be done professionally by a qualified company.

The cost of refinishing cabinets depends on the material and style of the cabinets, the type of finish chosen (stain or paint) and any repairs that need to be made to the cabinets. Generally, refinishing is less expensive than refacing or replacing the cabinets.

Before the refinishing process begins it is important to ensure that all of the damage has been repaired and the surface is clean. This will make the final product look better and last longer. The refinishing process can be done by hand or with a paint sprayer. Using a sprayer is faster and more efficient than using a brush or roller. A professional will use a high-quality sprayer that produces an even coat and is resistant to moisture.

Choosing between refacing and refinishing is a personal choice for many homeowners. Neither is ideal for every situation. Refacing is a more extensive project than refinishing and requires the installation of new doors and drawer fronts. Refacing can be more expensive than refinishing, but it is an option that offers more flexibility. If you are looking for a more dramatic change, refacing may be the right choice.

If your cabinets are in good shape but you want to change the look, refinishing is an affordable option. Refinishing can be completed in a day or two and is one of the cheapest methods of changing the look of your cabinets. However, if you have larger structural issues with your cabinets then refinishing or refacing may not be enough to solve them.

The Time

There are a few factors that determine how long it takes to complete your cabinet refinishing job. The first is how much work needs to be done. If you want your cabinets painted a new color, the job will take longer than if you’re just going to stain them. The second factor is how much experience the company has. Look for a company that has been in business for a while and has plenty of reviews online. This will give you an idea of how well they perform and whether they’re a good fit for your project.

The first step is to remove the cabinet doors and hardware. Then the surfaces are sanded, some by hand and some with power equipment, to prepare them for a new finish. This is usually the most time consuming part of the process. The length of time it takes to sand depends on the type of wood and how dark you want the finished product to be. It can also vary depending on how rough or smooth the surface is. Doors with ornate trim or windows will take more time to sand than simple, flat doors.

A new coat of primer will then be applied. Primer creates a smooth surface for the paint to adhere to, and it helps hide any imperfections in the wood. After the primer is dry, the final coats of paint can be applied. A single coat of paint is usually sufficient unless you’re going from a very dark color to something lighter, in which case two coats are recommended.

Cabinets are subjected to a lot of use and moisture, so they can begin to chip and peel over time. This can be a real problem, but it’s easy to fix with a fresh repaint. The best way to ensure that your cabinets last is to hire a professional. They’ll have the tools and experience to get the job done right, and they’ll typically stand behind their work with a warranty.

Before hiring a company, ask for recommendations from friends and family members who’ve had similar work done on their homes. Once you have a few companies in mind, compare their prices, services, and warranties before making a decision.

Excellent Advice On How To Avoid A Bad Social Media Marketing Plan

If your statistics are showing that your advertising efforts are yielding less traffic than they once did, consider adding social media marketing to your approach. Marketing through social media has greatly increased because of its simple success, yielding positive results. Follow these tips to build a successful marketing campaign.

Using Facebook can be a great way to promote your business. Facebook allows you to connect with your target audience. If you use Facebook correctly, you can interact with your audience in a friendly manner without pressuring them to purchase anything. If people connect to you on a personal level, they’re more likely to be interested in your business.

Use social media marketing to direct people to your website. Social media is limited compared to what a website can offer. For instance, you cannot directly sell a product from your page on social media, but you can from a website. Doing this can lead to a direct sale by using social media marketing.

When doing social media marketing, be certain you respond to those who ask questions or comment. Its pretty easy to miss new comments, so pay attention to finding them when you log in.

Utilize RSS feeds. These all people to subscribe to your feed and have the posts go into their Google Reader account once your feeds are published. This makes your content accessible in an easy-to-access way for your customers. Make the button to subscribe easy to identify, so the whole process takes no effort on the part of those visiting your site.

Now you know that successful social marketing is in your reach. Hopefully, the article above provided you with the information you needed to know about social media marketing. You can glean massive traffic to your site while spending very little. With that in mind, you would be well served by starting your social media marketing today!

You can also visit our other websites and post your article.

Bowman Bros Garage Builders, Gainesville Remodeling, Cabinet Finishing Dallas, Coast Mountain Catering, Carpet Cleaning Bath, Adrian Carpet Cleaning, Animal Land Pest Control, Best Las Vegas Mortgage, The Fencing Contractors, Green Ethanol Fireplaces, Durability Garage Doors, Tow Truck Warren MI, NDX Trading, Grand Rapids Air Duct Pros, Montgomery County Plumbing HVAC, Mesquite Windshield Repair, Local Advanced Home Repairs, Wedding Photography Brighton, Ballard Septic, DIY Door Furniture, Mainstreet Carrollton KY, Chelsea’s Critter Care, Yamamoto Wood Worker, The Youth Radio Network, The Jameson Law Firm, Arbor Tree Incorporated, Mountain Resource Center, Modern AVNC, Milten Berger Family Law, Kitchen And Bath Express, Cabinets Lima Ohio, Best New Orleans Orthodontist – Best Blog For Orthodontists, Delta Towing Service, Black Smith Towing, Directory Accounting, E-Technology News, Joan Lawman Beauty, Dynamic Fence Raleigh, JT Electric Company, Fishing Real Estate For Sale, Directory Accounting, E-Technology News, Joan Lawman Beauty, Dynamic Fence Raleigh, JT Electric Company, Fishing Real Estate For Sale, Eldorado Tree Trimming, Rock Stone Fireplace Design, Derby Mowers, Final Level Radio, Tampa Photographer Blog, Alleged Entertainment, Smith And Wesson Weddings, Loving Care at Home, Crystal Rose Catering, Brooklyn Orthodontics

A Guide to High Quality Cabinet Refinishing

Painting cabinet doors and drawer fronts is easy, but it’s important to do it correctly. This will ensure that the paint job is long-lasting, and will withstand heat, splatter and daily use.

The first step is cleaning the surface and crevices of the cabinets. A degreasing cleaner is recommended to ensure pristine paint adhesion.

Preparation

Cabinet refinishing is an excellent way to freshen up your kitchen or bathroom without the cost and hassle of replacing them. However, it’s vital that you take the time to perform quality preparation before beginning the refinishing process. Taking shortcuts here can lead to disappointing results. If you’re not careful, your cabinets will look worse than they did before and the problems you covered up with new paint will reappear later.

The first step is to remove your doors, drawer fronts and hardware. You should also label each piece with a marker or piece of tape, so you’ll know which one goes back where (e.g. “above sink, left”). If you’re worried about forgetting where something goes, keep a jar handy and put the screws and hinges in there. This will help you remember when it’s time to reattach them.

Next, thoroughly clean all surfaces. You can use a degreaser spray (such as Krud Kutter) or soap and water. Make sure to get into all the corners, crevices and tight spaces to ensure they’re completely clean. You should also wipe down the cabinet frames with TSP (trisodium phosphate) to eliminate grease and dirt. This will allow the new finish to adhere properly.

Once all surfaces are clean, sand them. This is a crucial step and should be done with a medium-grit sanding sponge or 180-grit sandpaper on a random orbital sander. You don’t need to go all the way down to bare wood, but you do want the cabinets to be thoroughly scuffed to give the new paint something to adhere to. Then vacuum and tack rag off the remaining dust.

When you’re ready to start painting, choose a high-quality urethane alkyd enamel paint. It will be much more durable than a standard latex paint and will hold up to everyday wear and tear. It’s important to follow the manufacturers instructions and work in a well-ventilated area.

When you’re ready to apply the first coat, let it dry for a few hours. Once it’s dry, you can move on to the second coat. Between coats, be sure to sand the surface to smooth out any bumps or rough areas.

Primer

A coat of high-quality primer is a necessary step when you’re performing cabinet refinishing. Primer is responsible for preparing the surface and ensuring that the topcoat paint sticks. It also solves a variety of issues including porous surfaces, stains, unwanted odors, uneven sheen, and texture.

It’s a good idea to use an oil-based primer, as it offers the best stain blocking properties. However, you may be able to find a water-based primer that will work as well. If you choose an oil-based primer, make sure to follow the directions for proper usage and cleaning.

Depending on the type of paint you’re using, there are many different types of primers available to help ensure that your cabinets will look great and last long. A great choice is KILZ Kitchen & Bath Primer. This primer creates a mildew-resistant coating and offers excellent adhesion to most interior surfaces. It can even be tinted to allow you to better match the color of your desired topcoat.

If you’re using a latex primer, you should choose a formula that is designed for your particular surface. This can be determined by the type of surface and whether or not you want a glossy finish. A primer that works well on most surfaces includes INSL-X STIX Waterborne Bonding Primer. This primer bonds to hard-to-coat surfaces, is moisture resistant, and can be recoated in 30 minutes.

Before you start priming, be sure to protect the surrounding area with painter’s tape and drop cloths or sheets. This will help to prevent any mishaps that could ruin the whole project. You should also remove any handles or hardware that may get in the way of your painting process.

Once you’ve prepared the surface for priming, sand away any existing stain or paint. This is a crucial step that you should never skip! You’ll need to sand the surface until it is smooth, but not so much that it becomes slick. It’s important to use a sander that isn’t too rough, as this can cause the new primer or paint to chip and peel over time.

Sanding

Cabinet refinishing is the process of working with your existing cabinets and removing or stripping the old finish in order to prepare them for stain or paint. This typically requires a lot of work and can take several days. To get the best results, it’s important to plan well and make sure you have enough help on hand to do the work thoroughly.

The first step in a successful cabinet refinishing job is to properly clean the surfaces. A thorough cleaning with a degreaser will remove any dirt, grease, and oil that may be on the surface or in crevices. This will ensure that the new primer and paint adhere to the surface properly.

Once all of the surfaces are cleaned, it’s time to sand. This is usually done with an orbital sander, but it can also be done by hand. Start with a medium grit, and then move on to a finer grit to remove any scratches or rough areas. A sanding sponge can be used to reach difficult spots and corners. After sanding, be sure to vacuum and use a tack cloth to remove any lingering sanding dust.

If you’re going from a light color to a dark shade, this is when you’ll want to do a second sanding with a 220-grit sandpaper. This will give the surfaces a smooth finish, and be sure to wipe everything down with tack cloth to remove any remaining sanding dust before moving on to the next step.

For painted cabinets, you’ll need to add a coat of primer. This will provide a base for the rest of the paint, and it will help seal knots and other defects that might show through the topcoat. Be sure to use a high-quality, oil-based primer. If you’re refinishing oak or walnut cabinets, a stain-blocking primer will be necessary, as these species have a coarser grain texture that can show through the topcoat.

After the primer has dried, you can begin painting the doors and drawer fronts. Be sure to wait a day or two before adding the final coats of paint, and be sure to allow the paint to dry completely. It can be tempting to rush the process, but rushing can lead to smudges and drips that will require extra re-painting or even replacement of the doors.

Painting

Cabinet painting is an effective way to give your cabinets a facelift without undergoing a full remodeling project. It allows homeowners to change the look of their rooms with new colors that are popular in their homes without breaking the bank for a complete renovation. When performed properly by a professional, it can also last longer than other methods of cabinet repair like refacing and replacing.

The type of paint that is used will have a big impact on how well your painted cabinets stand up over time. A high quality paint that is meant for use on cabinets will have a durable finish that can withstand chipping, peeling, and scratching. This paint will also have a primer built in that helps the base coat stick to the cabinets and prevent staining or discoloration from the underlying material.

Before the actual painting begins, the cabinets need to be cleaned to get rid of any dust and dirt that may have accumulated over time. Using a mild detergent is usually enough to remove the grime from most surfaces. After the cabinets are cleaned, they should be sanded again to prepare them for the new layer of paint. When the sanding is complete, a good quality oil-based primer can be applied to help the base coat adhere to the cabinets.

Once the primer is dry, it can be sanded again to smooth out any rough areas. Then the final coats of paint can be applied. It is important to choose a color that matches the rest of the room and will compliment your cabinets. When deciding on a color, it is also wise to consider how often you plan to wash the cabinets and what kind of stains or spills are likely to occur in the future.

When painting cabinets, it is necessary to allow the paint to fully cure before putting them back into use. This can take a few days. During this time it is best to be careful and not slam doors or scrape the surface of the cabinets. It is also a good idea to wipe them down occasionally so that messes can be cleaned up quickly.

Navigation